Google Apps Script - Webhook Processing Template with ScriptLab Logging
Overview
This quickstart template allows you to get started processing Shipwell webhooks quickly using Google Apps Script. The data, processes, and script execution status all integrate with the Shipwell platform and the Shipwell UI. This template allows you to clone/copy to get start quickly and add your own custom logic. The template builds on the concepts from Processing Webhooks with Custom Logic.
Webhook Script Template Organization
The project is organized into multiple files and each file contains related functions. Descriptions of the files are listed below:
-
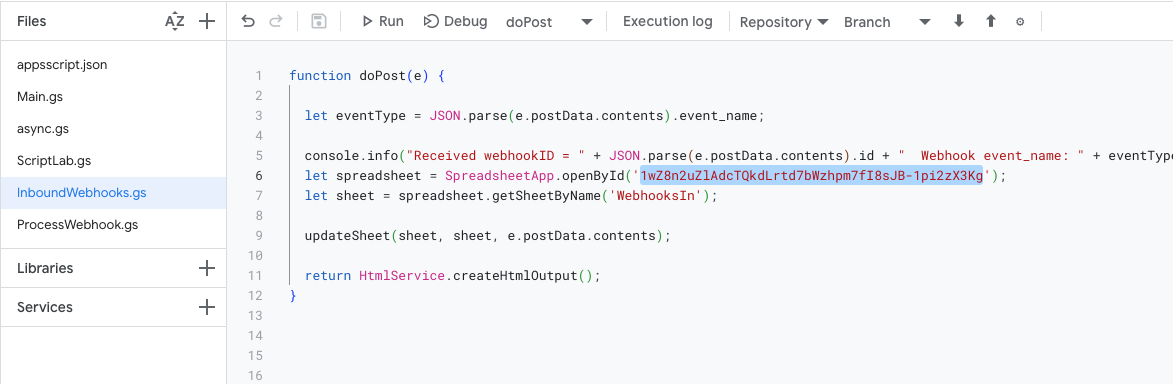
InboundWebhooks-
Receives the webhook
HTTP POSTand adds the webhook body/payload to theWebhooksInqueue.
-
Receives the webhook
-
Main-
Pulls webhook events from the webhooks queue.
Mainruns every minute and creates a trigger to schedule the appropriate async process for the webhook event pulled from the queue. It removes the webhook event from the queue and places it inWebhooksProcessedqueue. It stops pulling from the webhooks queue when the 20 trigger limit is reached.
-
Pulls webhook events from the webhooks queue.
-
ProcessWebhooks-
An async process scheduled by
Main. The webhook body retrieved from the webhooks queue is passed and this is where code is added for processing the webhook.
-
An async process scheduled by
-
Async-
Used by
Mainto schedule an async process.
-
Used by
-
ScriptLab-
Creates a class with methods to interface with Shipwell
ScriptLabservice which allow script execution monitoring and logging in the Shipwell platform.
-
Creates a class with methods to interface with Shipwell
Webhook Script Template Process Diagram
Process flow diagram for the Shipwell ScriptLab Template in this example. This utilizes Google Apps Script, allows processing webhooks without standing up your own infrastructure, and it enables monitoring and logging of your webhook processing and script execution from within the Shipwell platform.

Webhook Script Template Concepts
Concepts of how the Shipwell Webhook Processing Template and the scripts work are outlined below. Learn more about webhooks as a concept here.
Event Names
The list of webhook event names/types are available here.
Use of Custom Data
The Shipwell platform enables use of custom_data key-value pairs of data on many objects including webhook configurations. Learn more about custom_data here and more about how custom_data is supported in webhooks here
The Shipwell ScriptLab webhook template uses the following custom_data as a base:
{
    "name": "<user defined>",
    "token": "<user-token>"
}-
The
namecustom_dataproperty is used for documentation purposes only and will be used by `ScriptLabwhen displaying execution status in the Shipwell platform. -
The
tokencustom_dataproperty (learn more here ) prevents hard coding thetokenin the web app or script directly and uses the custom_data of the webhook configuration
Multi-Environment Support
The source environment where the webhook originated and the token in the custom_data property of the delivered webhook allow the single deployed endpoint or web app to communicate with multiple Shipwell environments. The function below demonstrates how the API token is created and the env (aka environment) URL is constructed for use in subsequent Shipwell API calls.
function setEnvVariables(webhookBody) {
    env = JSON.parse(webhookBody).source.environment;
    token = `Token ` + JSON.parse(webhookBody).custom_data.token;

    if (env == 'dev') {
        env = env + '-';
    }
    if (env == 'sandbox') {
        env = env + '-';
    }
    if (env == 'prod') {
        env = '';
    }
}
Use of Queues
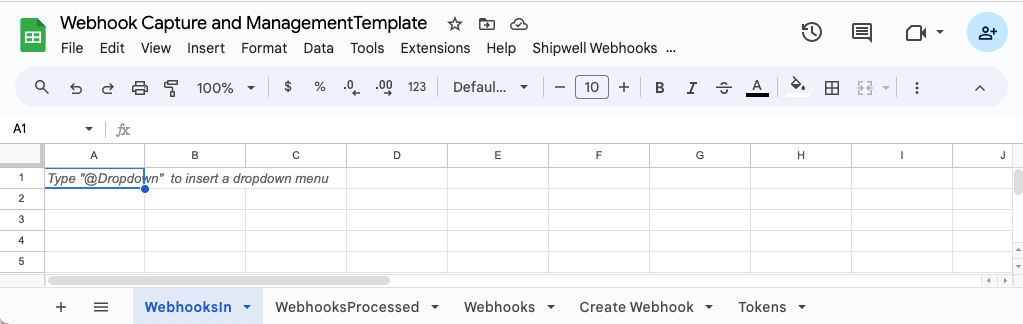
Inbound webhooks (webhooks sent from Shipwell and received "inbound" by your webhook endpoint URL) are processed using the Google Apps Script built-in function doPost() which extracts the request body from the webhook delivery and places it in the WebhooksIn queue. The Shipwell ScriptLab template uses a Google Sheet to implement queues and each queue is a separate tab in the Webhook Capture and Management Template sheet.
Asynchronous Processing
Google Apps Script uses triggers to schedule execution of the deployed web app but there is a limit of only 20 active triggers. The main process will pull webhook bodies/payloads from the WebhooksIn queue until the 20 trigger limit is reached.
Webhook Capture and Management Template Sheet Tab Overview
The provided sheet not only provides queues for processing webhooks, but also includes webhook creation and management features. The sheet has tabs that provide specific functionality which is described below:
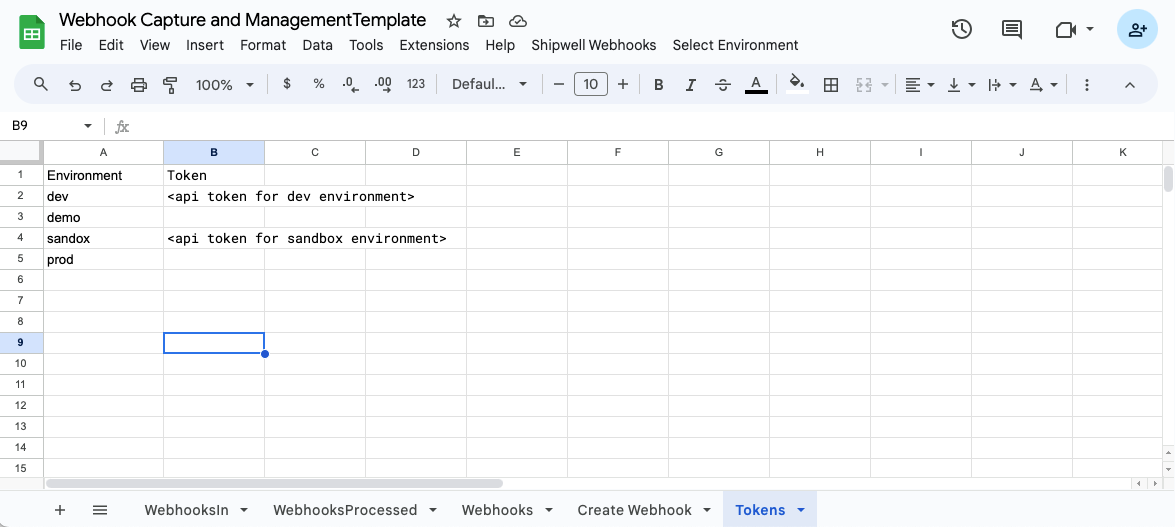
Tokens Tab
Used to store API tokens for the environments the user wants to manage.
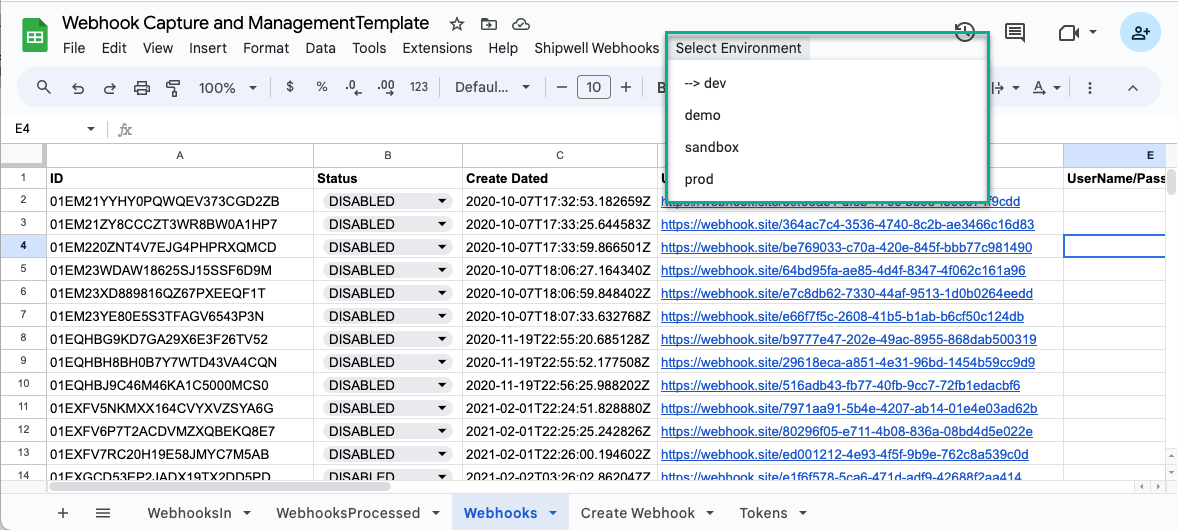
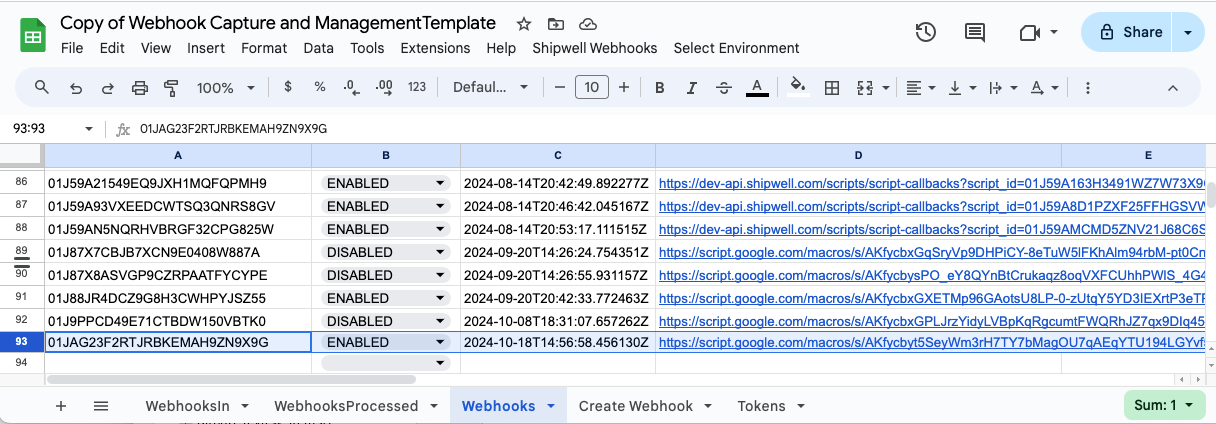
Webhooks Tab
This tab uses the tokens provided in the Tokens Tab when a user selects an environment to manage from the navigation window. Selecting an environment will refresh the sheet with all the webhooks created for that environment (if the token is valid for that environment). The user can update the status of a specific webhook configuration to DELETE (this will delete the webhook configuration), ENABLED, or DISABLED by selecting the dropdown in the Status column of the sheet.
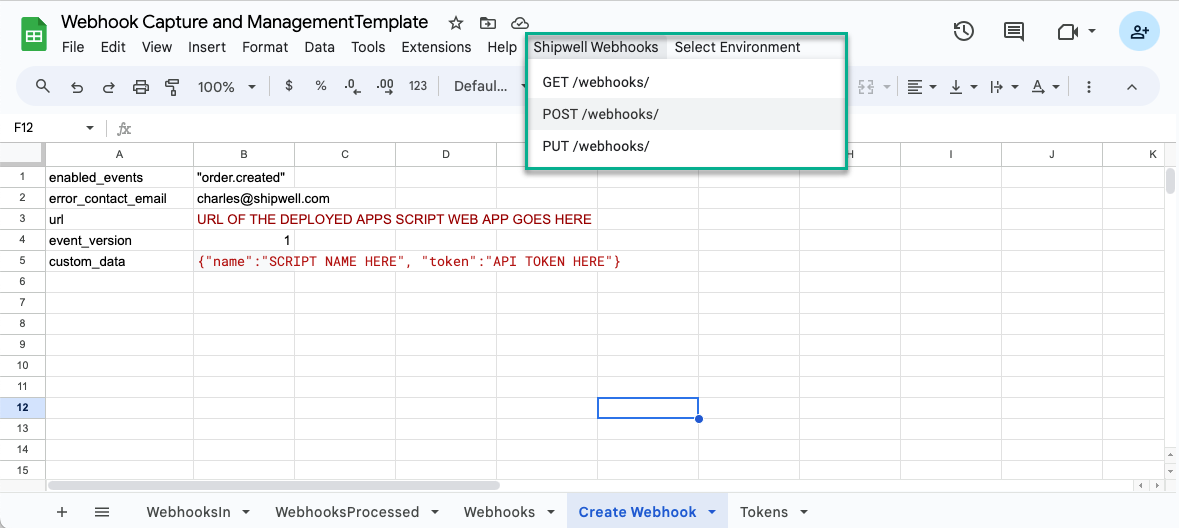
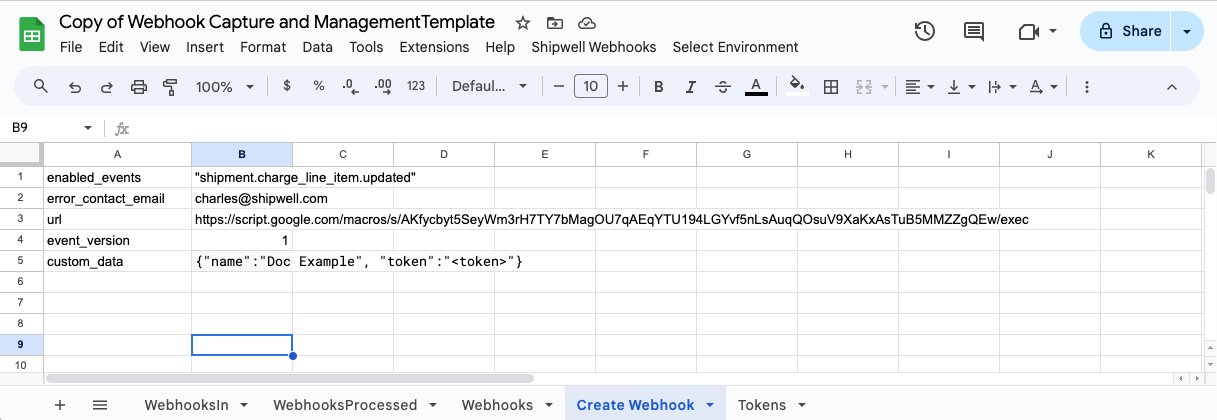
Create Webhook Tab
This tab is used to create a new webhook for the currently selected environment. The user provides which events are enabled, error email, url, event version, and custom_data. Selecting POST /webhooks/ from the navigation menu will create the webhook.
Webhook Script Template Getting Started Steps
Copy Template Files
Make a copy of the Google Apps Script project and the Google Sheet using the link below:
Tip
Ensure that the Google Drive location that you have selected to copy the files to is a Google Drive location that you have access to or you will receive an error.
Update Apps Script to Use Copied Google Sheet
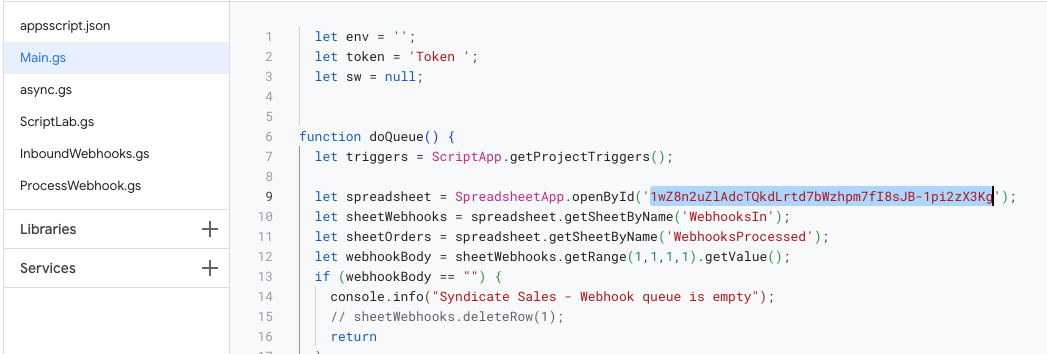
Copy the ID of the Google sheet (found in the url of the sheet) and paste it into the SpreadsheetApp references in Main.gs around line 9 and InboundWebhooks.gs around line 6.
Deploy Webhook Processing Web App
Select Deploy -> New Deployment and deploy the Google Apps Script as web app.
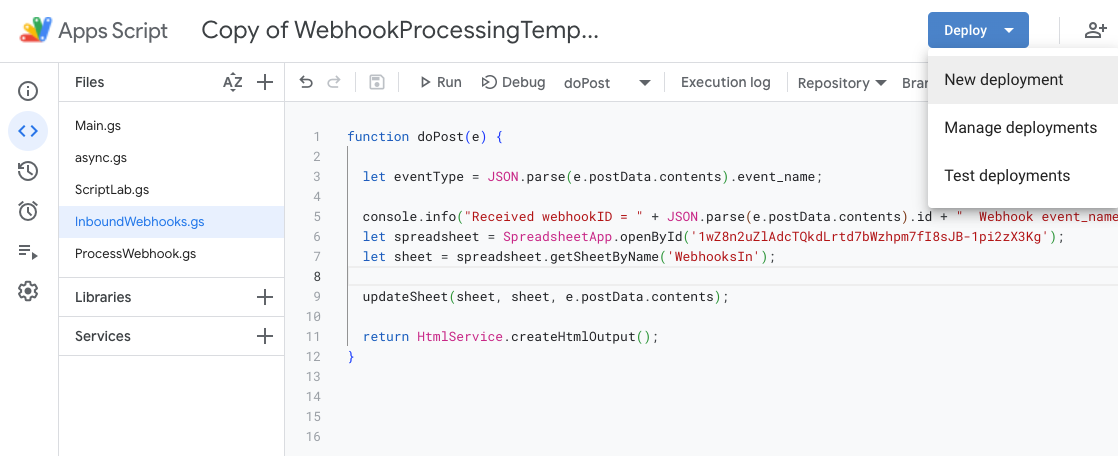
After deployment, the user may need to grant access to run the script. When deployment completes the user should copy the URL of the deployed web app to their clipboard and to cloud or filesystem storage. The URL will be used as the webhook endpoint that webhook events are sent to from Shipwell.
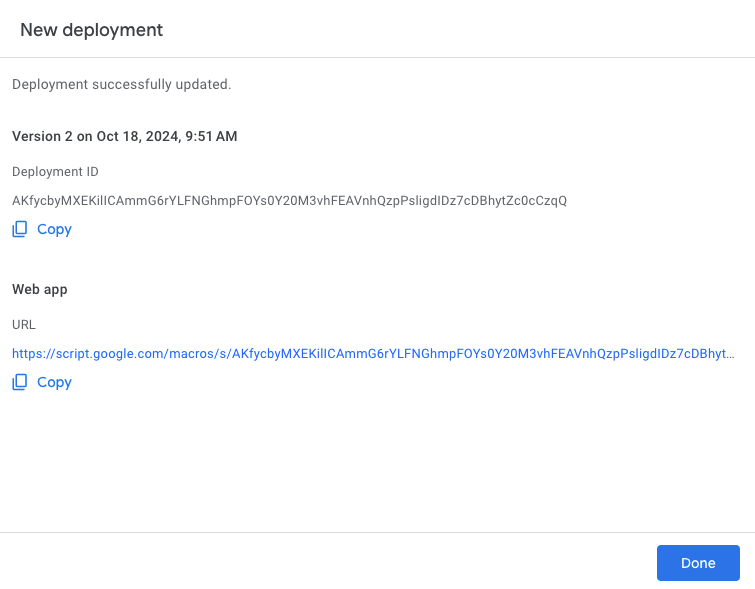
Tip
All the files are deployed as a web app (using the same steps as the deploy steps here) and execute as a single unit with a single URL. The URL is provided after deploying the web app and used as the URL for the Shipwell webhook.
Create Webhook
For this example, a webhook will be created using the shipment.updated event (see the webhook event types here). In the Google Sheet tab Create Webhook, paste the url of the web app and update the enabled_events column with the event name. Also update the custom_data field with the name and token.
From within the Google Sheet navigation menu, select Shipwell Webhooks -> POST /webhooks/. A notification of a script running indicates that the webhook configuration is being created in the actual Shipwell environment and account associated with the token. After the script execution completes, the newly created webhook configuration may be viewed in the Webhooks Tab.
Trigger Webhook
Login to the Shipwell platform and update the references of an existing shipment so the shipment.updated event will trigger the webhook (any kind of saved updated to shipment will trigger the webhook). The web app will receive the webhook delivery and place the webhook body/payload in the WebhooksIn queue. The webhook body can be viewed in the WebhooksIn tab of the Google Sheet.

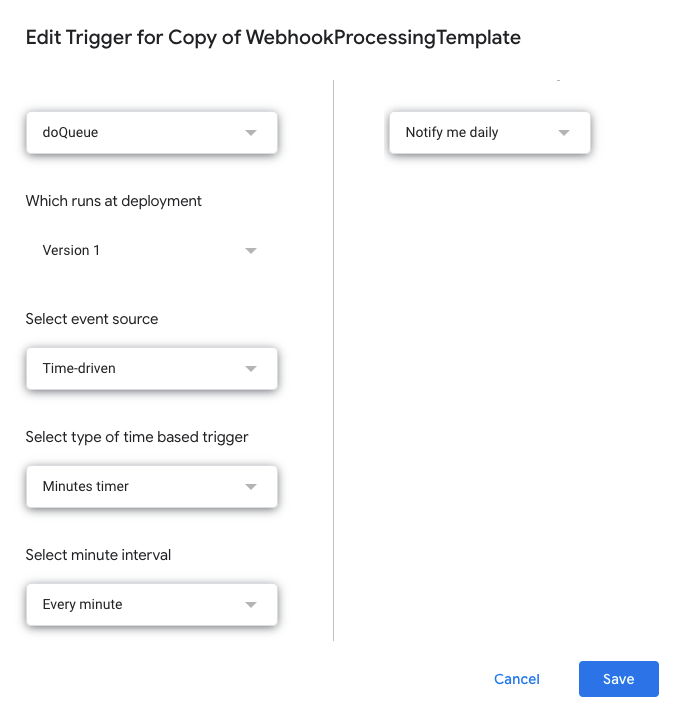
Enable Queue Processing
Navigate to the Triggers section in the Apps Script editor and select Add Trigger.
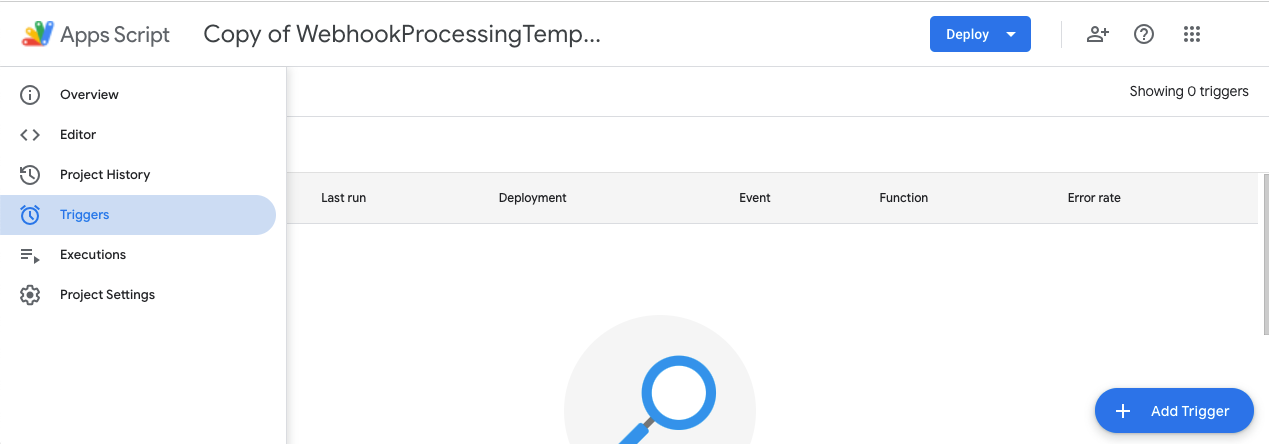
Set the parameters of the trigger to execute the doQueue function and use the version of the web app deployed. Also set the event source to be time-based using a minute timer to execute every minute. Then save the trigger.
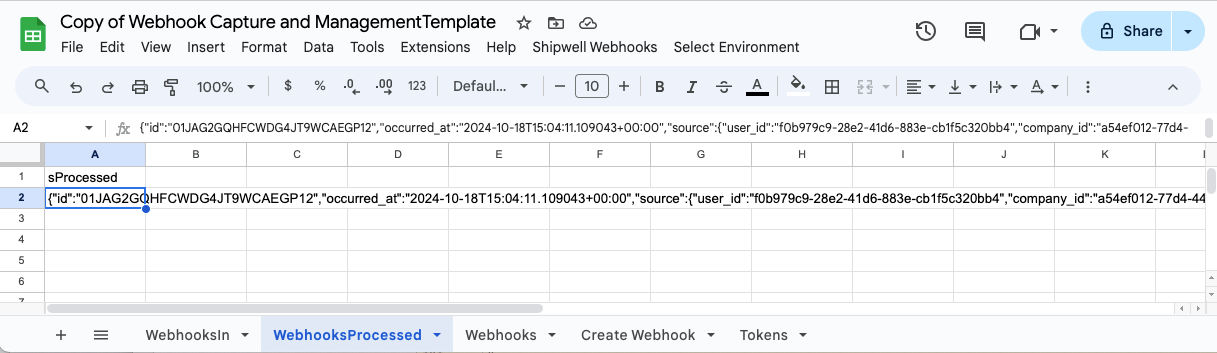
Verify Webhook Queue Processed
Return to the Google sheet and note that the WebhooksIn queue is now empty and the WebhooksProcessed queue has the processed webhook data.
View ScriptLab Workflows On Shipment Detail Within Shipwell Platform
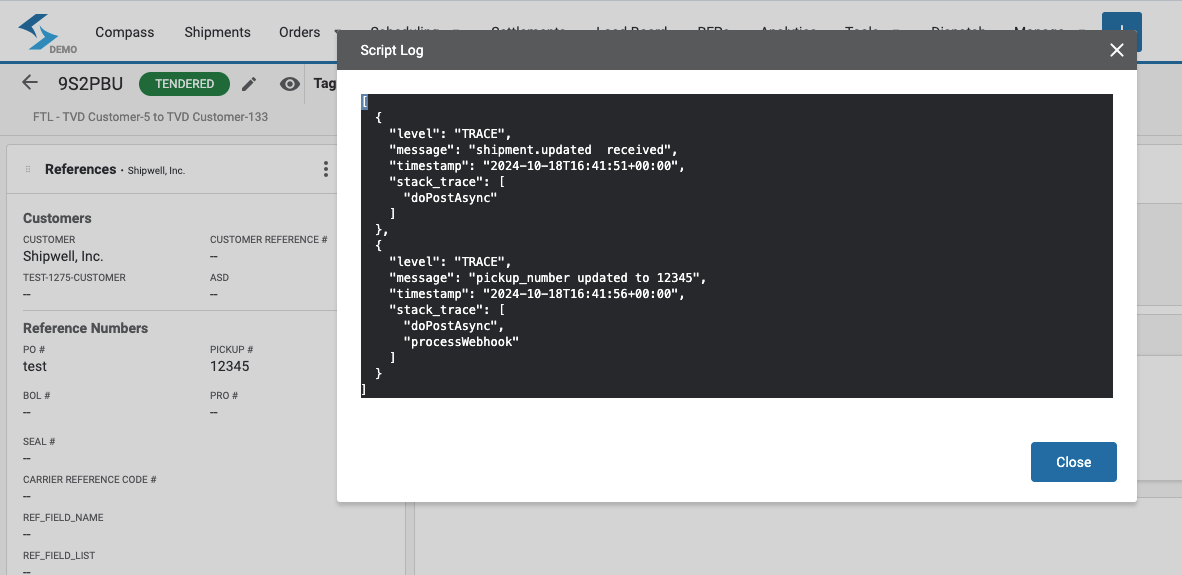
The status of the script execution is available in the Scripts section of the Workflows tab of the shipment details UI within the Shipwell platform.
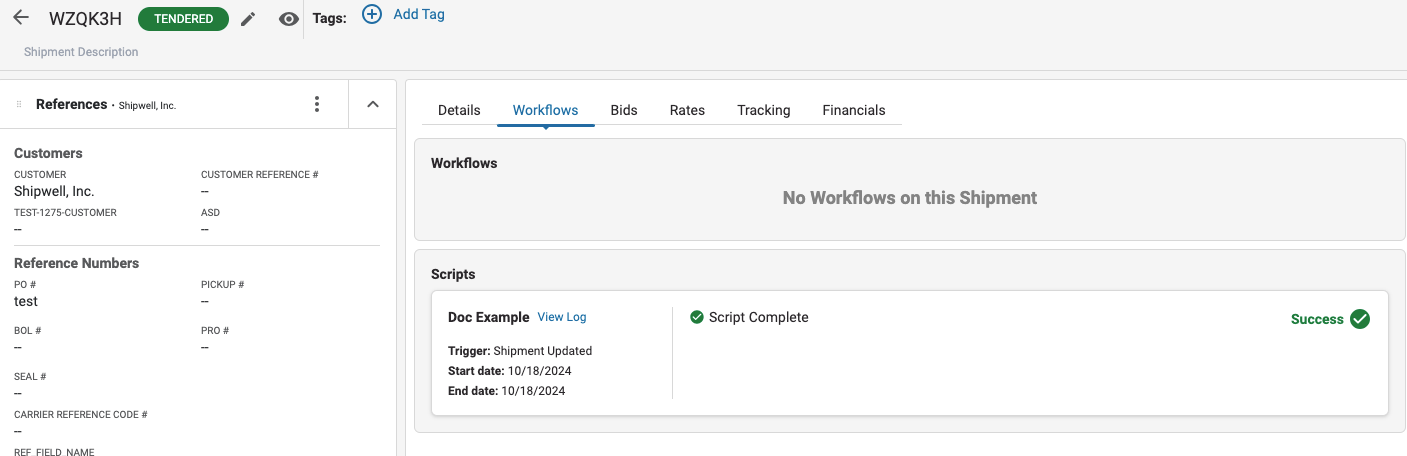
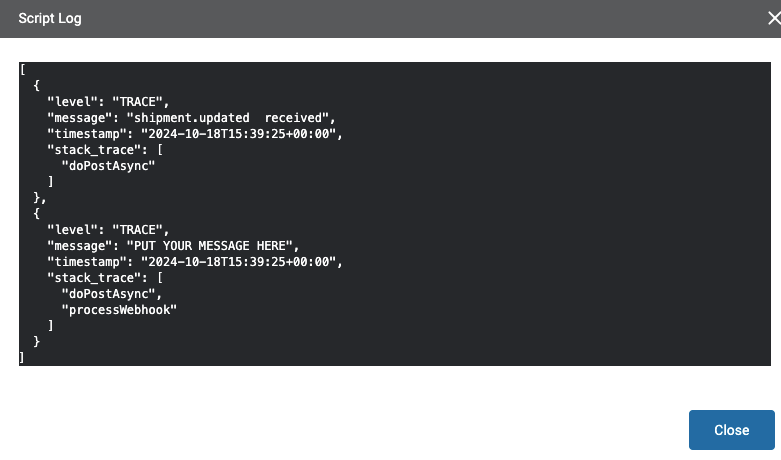
The name provided in the webhook custom_data is displayed here and selecting View Log will show the execution logs of the script.
Adding Your Custom Code and Logic To The Webhook Processing Template
Add your code to the ProcessWebhook.gs file in the processWebhook() function.
In this example of adding custom logic, we're going to use the self_link in the webhook to GET the shipment, update the Pickup # reference data, and then PUT the shipment back.
Replace the code in the file with the code below to perform the update. See Processing Webhooks with Custom Logic - Define Processing Logic for additional details regarding the callShipwellAPI() function.
function processWebhook(webhookBody) {
    let url = 'https://' + env + 'api.shipwell.com' + JSON.parse(webhookBody).details.self_link;
    let shipmentData = callShipwellAPI(url, 'get');
    shipmentData.pickup_number = "12345"
    shipmentData = callShipwellAPI(url, 'put', shipmentData);

    logEntry = {
        "level": "TRACE",
        "timestamp": '',
        "message": "pickup_number updated to " + shipmentData.pickup_number,
        "stack_trace": [
            "doPostAsync",
            "processWebhook"
        ]
    };
    sw.pushLog(logEntry);

    console.info("pickup_number updated to " + shipmentData.pickup_number);

    return;
}
Deploy Changes To Webhook Processing Logic
Save the changes and select Deploy. Copy the url provided after the deploy completes and update the webhook created earlier with the new url. Delete the previously created trigger and create a new one using the newly deployed version of the web app.
While this is a trivial example, it demonstrates the process to call the Shipwell API and update a shipment object. After updating a shipment the user will note that the Pickup # has been updated to 12345 and the script logs show the updated ScriptLab messaging.